Background
I initially saw this video, where the author Chuck mentioned the last macOS terminal trick
He said you can modify /etc/pam.d/sudo by adding auth sufficient pam_tid.so to enable fingerprint authentication for all future sudo commands. It’s super cool and fast, especially if you have a long password that would be annoying to type.
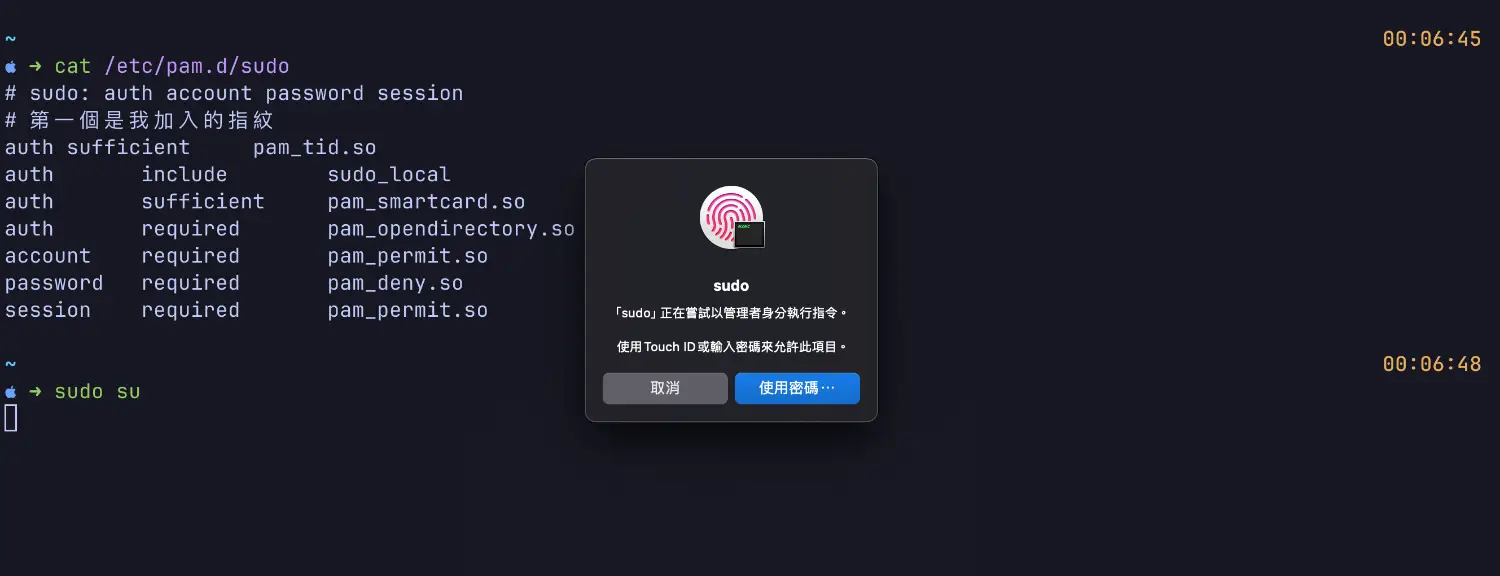
cat /etc/pam.d/sudo
# sudo: auth account password session
auth sufficient     pam_tid.so
auth       include        sudo_local
auth       sufficient     pam_smartcard.so
auth       required       pam_opendirectory.so
account    required       pam_permit.so
password   required       pam_deny.so
session    required       pam_permit.so
But funny enough, I accidentally wrote pam_unix.so instead of pam_tid.so (sometimes you really need to be careful with GitHub Copilot!)
This caused me to get sudo: unable to initialize PAM: No such file or directory when I tried to use sudo after saving and exiting. This means the pam configuration file is corrupted, and to fix this file you need sudo permissions. So yeah, awkward, tragic, I’m screwed.
Solution
After chatting with Perplexity, I learned that when system-level things like this break on macOS, you can fix them using “Recovery Mode”. In this mode, the terminal defaults to super user, so you just need to use this mode to fix /etc/pam.d/sudo!
Here are the steps:
- Shut down
- Press and hold the power button until “Continue holding to enter options” appears
- At this point you can choose your disk and options, of course you want to choose “Options”, then press Continue
Perplexity told me I could use “Disk Utility” to select the disk mounting /etc, then use vi to edit it in the terminal. I later found out this isn’t necessary - this step is probably just to confirm the Volume name. I ended up using the following command:
As for how to open the terminal, you can see a menu bar at the top of the screen, there’s a place there to open the terminal.
$ vi /Volumes/Macintosh\ HD/etc/pam.d/sudo
After fixing and saving, restart your computer and you can use fingerprint to authenticate sudo!! Super cool.